I’ve tested many different ways and weblog clients to create blog posts more effectively, but know I seem to find the best way and I wanted to share it with You. Maybe technique will seem very simple to experienced bloggers, but at least for me it was something I wasn’t aware at start and found out just by testing.
At first I would suggest to use any desktop editing program, because coding article by hand in my opinion takes too much effort, which is not worth it really. I have been using Windows Live Writer for some time, where I like to get automatic SpellCheker, but now I am sticking to another free weblog client BlogDesk. In my opinion these are the best choices if You’re using Windows ( I don’t know how about Mac).
At first I also enjoyed that images are dynamically uploaded to server, while I didn’t reach some problems:
- While images are uploading on server dynamically, it takes a lot of CPU and memory and if You’re getting some errors, like images accidentally change address (happened to me twice, though I don’t know real reason, but I got my lesson), You may also get server overload.
- I am using WordPress, I don’t know what difference may it cause, but when uploading images, Blogdesk and also Windows Live Writer are creating unnecessary images, cropped in different sizes, even if I am using only original size.
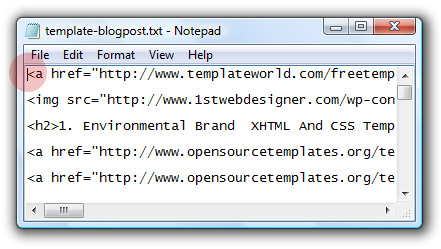
So these were my problems. I am using a lot of images in my list articles, so it was pretty important. So I found solution, which maybe will be useful for You too. I am writing all of my articles on BlogDesk, also I add images to get better overview how everything will look like. When I am done, I go to source/code view ( View–>Source on Blogdesk), then select all code and copy it. Ctrl+a, ctrl+c. Yes, yes, I want to use Find and Replace feature. It’s built in on Notepad and several other text editors, but notepad owns every Windows user. I paste all code on Notepad and leave it there for now. I think for MAC users it should be similarly, You just need that built-in replace feature.
All pictures are kept in one folder at first, I always create new folder for each article and build little backup files for emergencies. So now open Your FTP client, go to place where You want to upload Your images, better create new folder for each article and do Your thing. If You are using WordPress, I would suggest to use path –> public_html(Your domain address)/wp-content/uploads/2009/03/Your-article-title-folder/.. and drop images here. It’s handy to separate Your files smart, so You can later easily manage them.
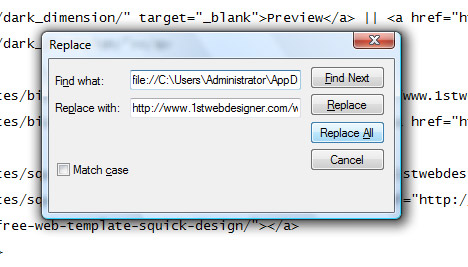
Ok, now let’s return to source code and use handy find/replace feature (I used my site and image path I had).
Idea is to find default image path and replace it with Your online version, so You upload only images You need and manually so Your server don’t get too busy too.
Make sure also Your cursor is active at the start of the post, so You don’t miss any image.

Just copy/paste Your current path and replace it with Your online version and hit “Replace all” button – easy and safe.

Now just paste whole code in new post HTML view and publish article, it’s simple as that.
One more suggestion. I know there are no easy way to convert simple text to headings in weblog clients. At least I have huge list articles and if I use headings, it is a lot more friendlier for SEO than just simple text in bold.

I just put all text I want to convert to headings in <strong></strong> tags, simply and then use the same find/replace feature.
First time I replace <strong> to <h2> for example, second time I replace </strong> with </h2>
I am really hoping this helped, though I am not too good giving tips than creating just list articles 🙂 Let me know if this helped for You and if You have some questions please ask. Also if You know some more advanced way how to do this job, feel free to share.